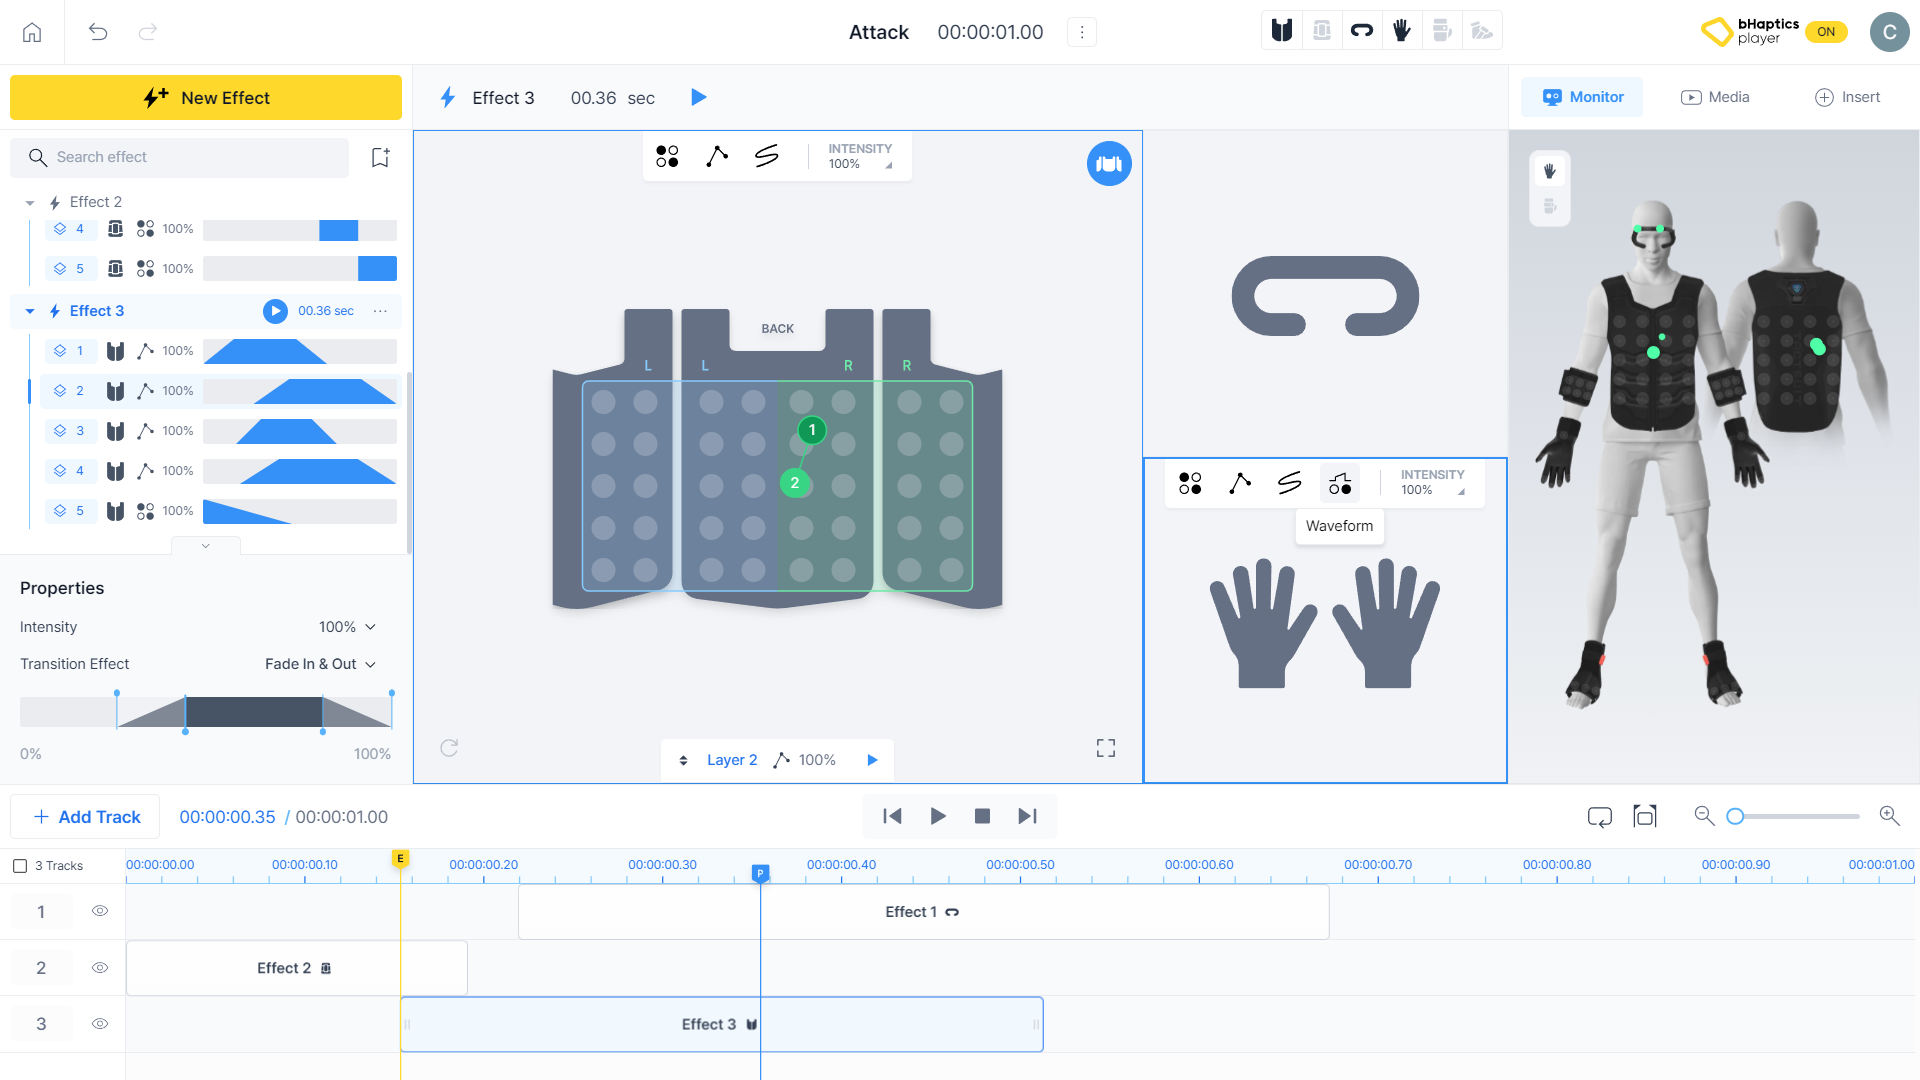
Track and Timeline
So far, we've created multiple layers within a single effect, edited them, and managed them all at once.
Now it's time to manage more than one effect. We will now create more effects and learn about track and timeline to sequence the effects. We will complete our haptic pattern through this process.
Timeline
The timeline located at the bottom of the editor is where you will control playback and arrange effects into your haptic pattern.

- (A) Play position (with pattern duration)
- (B) Playback controls
- (C) Enable loop playback & Select repeat section & Zoom in/out
- (D) Playback bar
- (E) Effect marker
- (F) Track management
Playback Bar
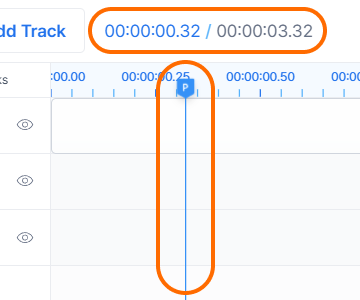
Within the timeline, there is a playhead which is a blue vertical line labeled with a 'P'. This indicates the current preview time during playback of patterns. As playback progresses, the playhead moves along the timeline in sync with the passage of time. It can also be dragged to adjust to your desired points.
You can check the exact position of the playback bar at the play position.
Playback Controls

Playback controls allow you to navigate the pattern.
- Move to start: Move the playback bar to the beginning.
- Play/Pause: Initiate playback or press again to pause.
- Stop: Move the playback bar to the beginning or to the start point of the repeat section when the repeat feature is enabled.
- Move to end: Move the playback bar to the end time of the final effect in the pattern.
Effect Marker
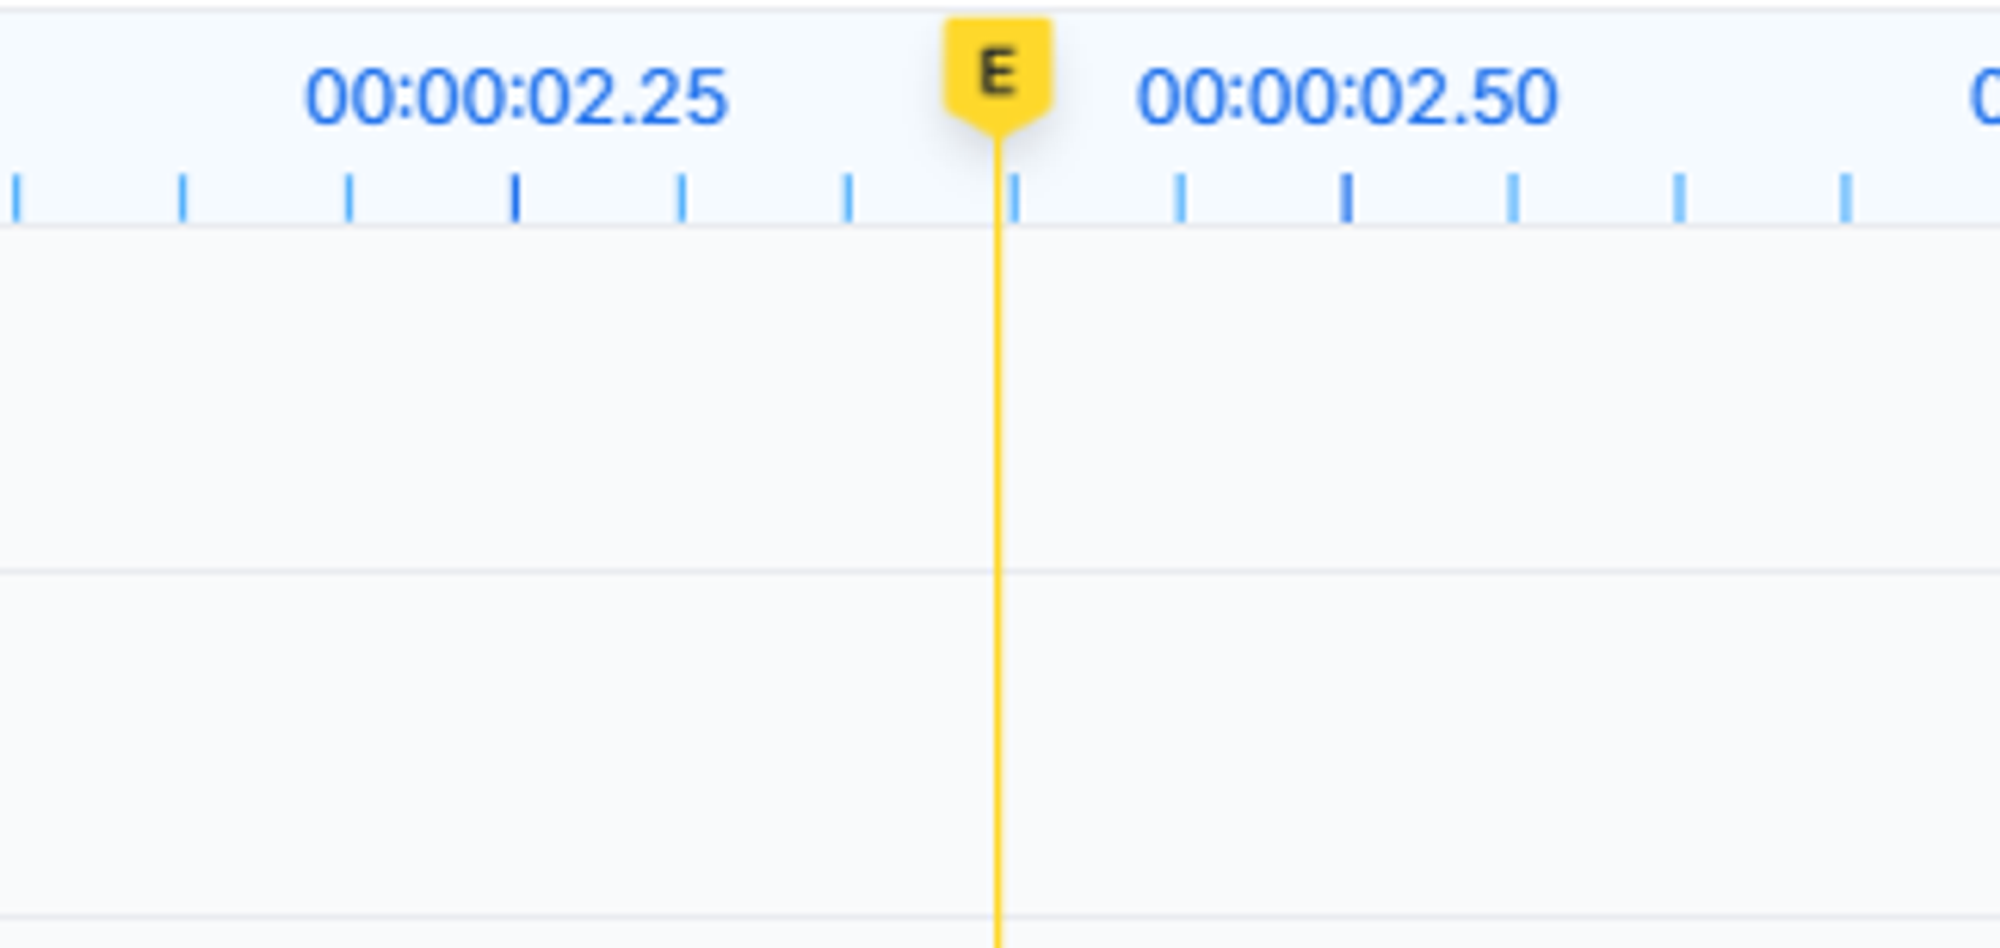
There is also an effect marker which is a yellow vertical line labeled with an 'E' on the Timeline.
Its starting point aligns with this marker when you add a new effect.
Enable loop playback
![]()
Enabling the loop playback automatically loops back to the beginning after the pattern preview ends. This lets you preview patterns endlessly without interruption.
Select repeat section
You can specify the section you want to preview.
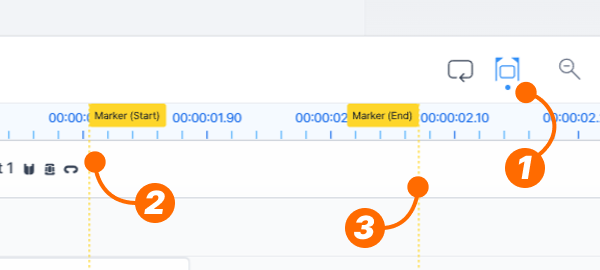
- Press the 'Select repeat section' icon.
- Then, the "Marker (Start)" will appear. Click where you want to place the start of the repeat section.
- Next, the "Marker (End)" will appear. Click where you want to place the end of the repeat section.
After you place the two markers, you can adjust the zone by dragging the markers.
Using the "Enable loop feedback" will allow the section to repeat automatically.
Press the icon again to disable the repeat section feature.
Zoom in/out

Zoom feature lets you adjust how much detail you see on the timeline. You can focus on specific parts or see the whole sequence at a glance.
Sequence the Effects
Move
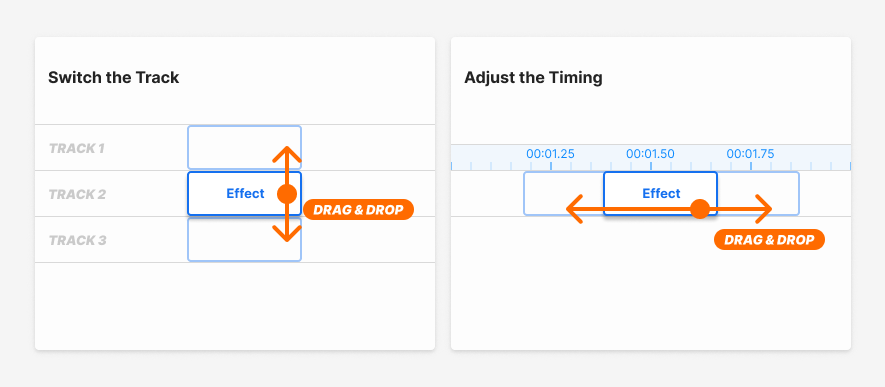
You can drag the effect to change the position within the Timeline. Move it vertically to switch the track, and horizontally to adjust the timing.
Adjust the Length

When hovering your cursor over the effect within the track, you'll notice the handles positioned at both ends. These handles allow you to adjust the duration of the effect by simply dragging them left or right.
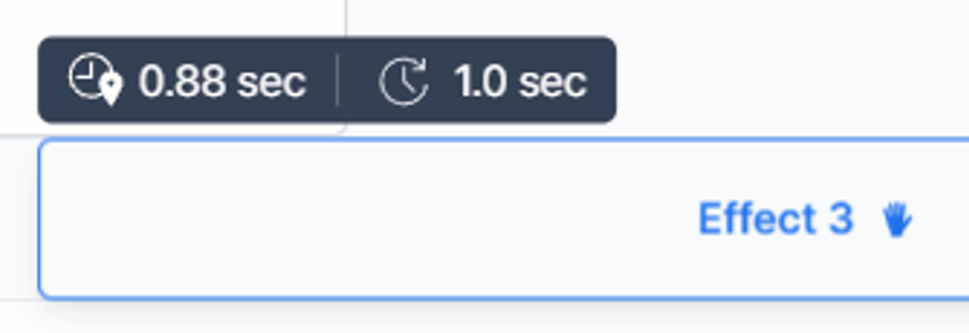
While you're dragging or resizing the effect, a helpful pop-up will appear, displaying the start time of the effect on the left and its duration on the right.
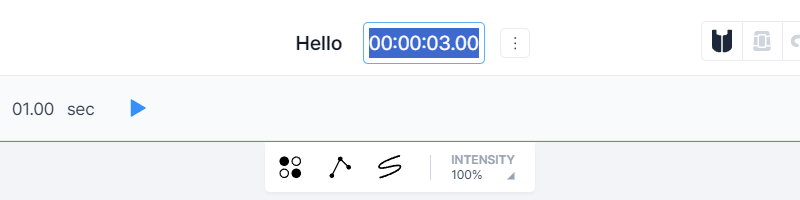
If you want to change the duration of the pattern(not the single effect), there is a simple way. Press the time at the Menu bar, and you can modify the value.
Manage the Tracks
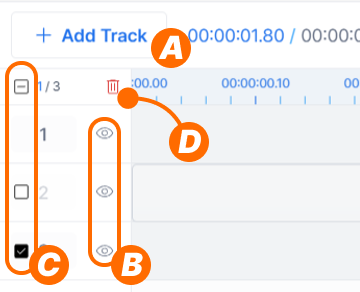
You can manage the tracks shown on the left of the Timeline.
- (A) Press "Add Track" to add new track at the bottom.
- (B) Disable/Enable a track. You can exclude the effects located within the track.
- (C) A checkbox will appear when you hover the mouse cursor over the track number. You can choose which track to remove. There is also a checkbox at the top to select all the tracks.
- (D) Press 'Trash' icon to remove the track(s) you selected.
note
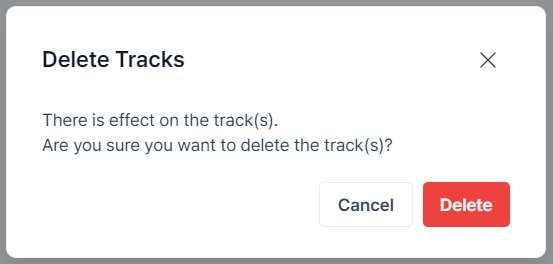
If you delete the track with the effect in it, a warning will appear. Make sure to move the effect to another track unless you intend to remove the effects together.
Let's add more Effects
Now we know how to move and change the duration of the effect. You now know how to arrange multiple effects in the timeline!
Press "New Effect" to add some more effects and add layers into this. Then, you can sequence the effects in the Timeline freely. Let's make the haptic patterns more fancy!
Group
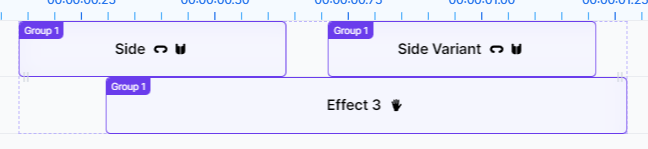
You can also group effects together, allowing them to move and resize simultaneously when placed within the same group.
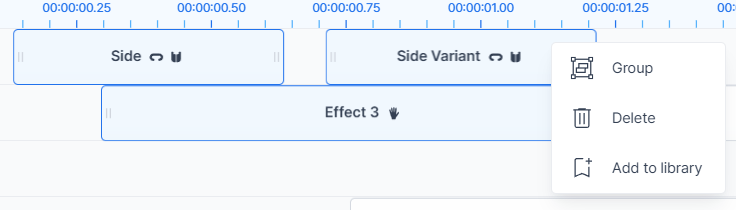
- Click each effect you want to include to group by holding down the Control key.
- Right click on the selected effect and press "Group".
You can ungroup by right clicking the group and selecting "Ungroup all".
You have now learned all the essential techniques for creating haptic patterns. However, there's one more feature that makes the process of creating haptic patterns faster and easier. Next, we will learn about the library and template.